

In the world of automotive lighting, upgrading your Audi headlights to LED technology is one of the most effective ways to enhance visibility and overall driving experience. Traditional halogen bulbs have been the standard for many years, but advancements in lighting technology have made LEDs the preferred choice for modern vehicles.
Switching to LED headlights not only improves the brightness and clarity of your lights but also offers additional benefits such as energy efficiency and longer lifespan. This guide will provide you with a comprehensive overview of the steps required to successfully upgrade your Audi’s lights, ensuring you make the most informed decision and installation.
Whether you own a sporty Audi or a luxurious sedan, transforming your headlights to LED can significantly affect your vehicle’s aesthetics and performance on the road. This guide aims to equip you with all the necessary information to complete this upgrade efficiently and safely.
Upgrading Audi Headlights to LED: A Complete Guide
Upgrading the headlights of your Audi to LED lights can significantly enhance visibility and modernize your vehicle’s appearance. This guide will walk you through the essential steps to upgrade your Audi’s headlights to LED technology.
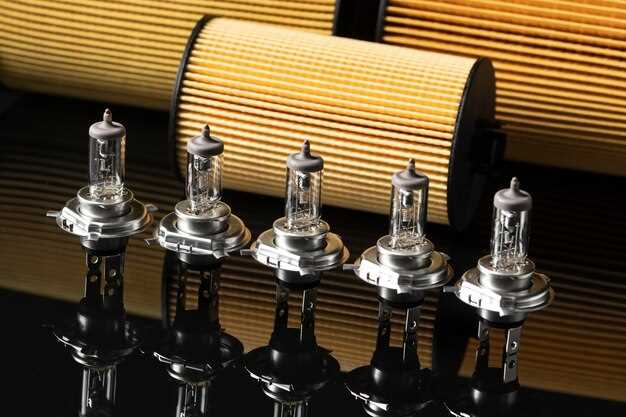
The first step in the upgrade process is to determine the compatibility of LED headlight bulbs with your specific Audi model. Check the owner’s manual or consult with your local Audi dealership to identify the correct bulb size and type. Common LED options include H7, H11, and 9005, among others.
Once you have the right LED headlight bulbs, gather the necessary tools. You will typically need a socket set, flathead screwdriver, and possibly a trim tool to remove the headlight assembly if required. Ensure you are working in a well-lit area to avoid mistakes during installation.
To begin the installation, open the bonnet and locate the headlight housing. Depending on your Audi model, you may need to remove the cover or other components to access the bulbs. Once you reach the back of the headlight assembly, disconnect the power supply by gently removing the electrical connector from the existing halogen bulb.
Carefully remove the existing headlight bulb from its socket. This may involve twisting or pulling, depending on the design. Be cautious not to touch the glass of the new LED bulbs with your fingers, as oils can cause premature failure. Install the new LED headlight bulb into the socket, ensuring it is seated securely.
Reconnect the electrical connector to the LED bulb. It’s important to make sure all connections are tight to avoid flickering or malfunctioning lights. Test the new LED headlight by turning on your vehicle and verifying that the lights function correctly before reassembling any components that may have been removed.
Lastly, adjust the beam alignment if necessary. LED lights may have a different beam pattern compared to traditional halogen bulbs, and proper alignment is crucial for optimal visibility and to avoid blinding oncoming drivers. Many Audi models feature adjustable headlight mechanisms to assist with this process.
Upgrading to LED headlights not only improves visibility but also increases energy efficiency, offering a longer lifespan compared to traditional lights. Enjoy your enhanced driving experience with your newly upgraded Audi LED headlights.
Selecting the Right LED Headlights for Your Audi Model
Upgrading the headlights on your Audi to LED is a fantastic way to improve visibility and enhance the overall look of your vehicle. However, selecting the right LED headlights can be a daunting task. Here are some factors to consider to ensure you make the best choice for your specific Audi model.
- Compatibility: Make sure the LED headlight bulbs you choose are compatible with your particular Audi model. Check the owner’s manual or consult with a professional to determine the specific bulb sizes required.
- Brightness Level: LED headlights come with varying brightness levels measured in lumens. Consider your typical driving conditions and choose LEDs that provide sufficient brightness without causing glare for other drivers. A common range is between 3200 to 6000 lumens.
- Color Temperature: The color temperature, measured in Kelvin (K), affects the appearance of the light. A range of 5000K to 6500K offers a bright white light that enhances visibility while giving a modern aesthetic to your Audi.
- Heat Management: Good heat dissipation is critical for LED longevity. Look for headlights with built-in cooling mechanisms such as heat sinks or fans to prevent overheating and ensure optimal performance.
- Brand Reputation: Select LED headlights from reputable brands known for quality and reliability. Research reviews and ratings to find products that other Audi owners highly recommend.
- Installation Ease: Some LED headlights come with plug-and-play designs that make installation straightforward. Ensure you understand the installation process involved; some setups may require additional wiring or modifications.
By considering these criteria, you can confidently select the right LED headlights for your Audi, ensuring a successful upgrade that enhances safety and style on the road.
Step-by-Step Installation Process for Upgrading to LED Headlights
Upgrading your Audi’s headlights to LED is a straightforward process that enhances visibility and modernizes your vehicle’s appearance. Follow this guide for a successful installation.
Step 1: Gather Your Tools and Materials
Before starting, ensure you have all necessary tools at hand. You will need a flathead screwdriver, a socket wrench, and the appropriate LED headlight bulbs for your model. It’s also advisable to wear gloves to avoid touching the bulb with bare hands.
Step 2: Open the Hood
Begin by opening your Audi’s hood. Locate the headlight assembly where the existing bulbs are installed. This is typically done by releasing the hood latch inside the vehicle and lifting it gently.
Step 3: Remove the Headlight Assembly
To access the headlight bulbs, you may need to remove the headlight assembly. This usually involves unscrewing a few bolts or screws using a socket wrench. Carefully pull the assembly out, being cautious of any wiring attached.
Step 4: Disconnect the Wiring Harness
Locate the wiring harness connected to the headlight bulb. Gently disconnect it by pressing the release tab and pulling it away. Make sure not to force it, as this may damage the connector.
Step 5: Remove the Existing Bulb
Twist the old bulb counterclockwise to remove it from the socket. If there is any dust or debris inside the socket, clean it with a cloth before proceeding.
Step 6: Install the LED Bulb
Take your new LED bulb and insert it into the socket. Make sure it aligns properly and twist it clockwise until it is securely in place. Avoid touching the LED part with your fingers to prevent oil contamination.
Step 7: Reconnect the Wiring Harness
Reconnect the wiring harness to the new LED bulb. Ensure that it is securely attached and that there are no loose connections.
Step 8: Reinstall the Headlight Assembly
Carefully place the headlight assembly back into its original position. Secure it by tightening the screws or bolts that you removed earlier.
Step 9: Test the New Headlights
Before closing the hood, turn on your vehicle and test the new LED headlights to ensure they function correctly. Check both low and high beams, if applicable.
Step 10: Close the Hood
If everything works as expected, gently close the hood of your Audi. Your upgrade to LED headlights is now complete!
Common Issues and Troubleshooting After LED Headlight Installation

After upgrading your Audi’s headlight system to LED, you may encounter several common issues. Proper troubleshooting can ensure that your new lighting functions optimally and enhances visibility without complications.
One frequent issue is flickering headlights. This often occurs due to incompatibility between the LED bulbs and the vehicle’s existing wiring or electronic control unit. To resolve this, consider installing a CANbus decoder, which helps regulate voltage fluctuations and eliminates flickering.
Another problem is a misalignment of the headlights. LED bulbs can have different beam patterns compared to halogen bulbs, leading to improper illumination of the road. To fix this, adjust the headlight position following your vehicle’s manual instructions, ensuring that the beams are correctly aimed for optimal visibility.
Some users report an error message on the dashboard after the upgrade. This may be due to the vehicle’s system not recognizing the new LED lights. In such cases, using a resistor kit can help bypass the error by tricking the system into thinking the original bulbs are still installed.
Lastly, overheating can be a concern with LED installations if the heat sinks are not sufficiently cooled. Ensure that the LED bulbs have adequate ventilation and consider additional cooling solutions if necessary to prevent damage to the lighting assembly.